Wild Beast Shipping Crates

June 24th, 2017

So … I bought these Wild Beast Shipping Crates from 4Ground and I’m very impressed.   They come flat packed in laser cut card form and could be pushed free with ease (although I’d recommend a craft knife, especially for the finer parts).  the outer box cladding nicely covers up the join lines on the boxes so it makes for a really neat finish.  

To build them I just used normal wood glue and an old brush to assemble them but a word or two of warning; firstly, make sure you assemble correctly, especially the tops and bottoms of the outer case of the boxes (the piece with the most supports go underneath.  Secondly, the the order in which the instructions suggest assembling the outer case is not ideal, there is a better way which involves putting the pieces that exactly fit to the edges in order.  Also worth mentioning that the top or bottom of a box is slightly different (the bottoms are more reinforced).

Enjoy!

Modern Streets – Update

August 25th, 2015

This is what the finished test looks like.  I have 15 more tiles so I can create a circa 4′ x 4′ ply area, although only 7 are roads.


1970s_Streets_8

Modern Era Streets – 28mm scale

August 7th, 2015

I’m doing a terrain project to create urban terrain tiles that I can use primarily for British 1970’s street scenes.  I want them to be fairly versatile for other ‘street games’ (including a secret project).

Consequently after a bit of trial and error using Foamboard to create 300mm x 300mm tiles and having them bend out of shape I hunted for advice and ideas from the best wargaming resource know to humans, the Leadadventurers forums, … and my builder mate, Jason.  As a result I’m trialling something new.

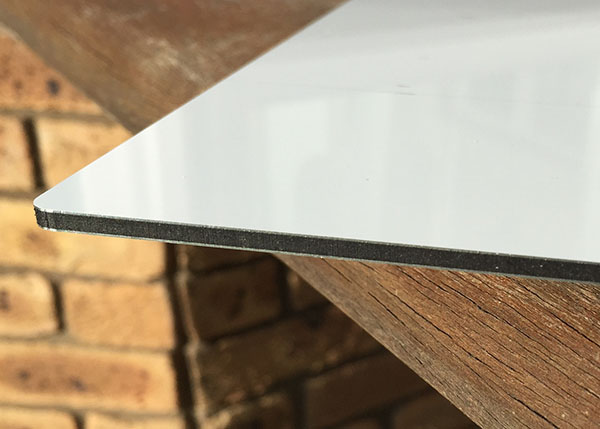
So this is a close up of the stuff I am using.  This is sourced from a local sign making shop @ 2.50 per 300mm x 300mm sheet.  There is some cheaper stuff which is pretty much identical at £2.00 per 300mm x 300mm sheet.  The core is solid plastic of some type, not ‘foam’.

1970s_Streets_2

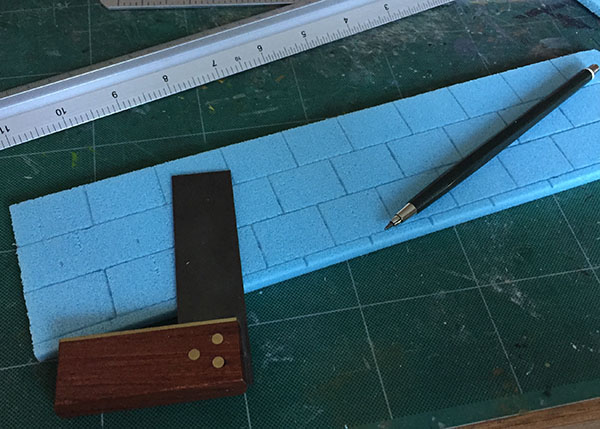
This is a 5.5mm Styrofoam sheet from Antenociti’s Workshop.  I’ve scored the pavement with a sharp pencil.

1970s_Streets_3

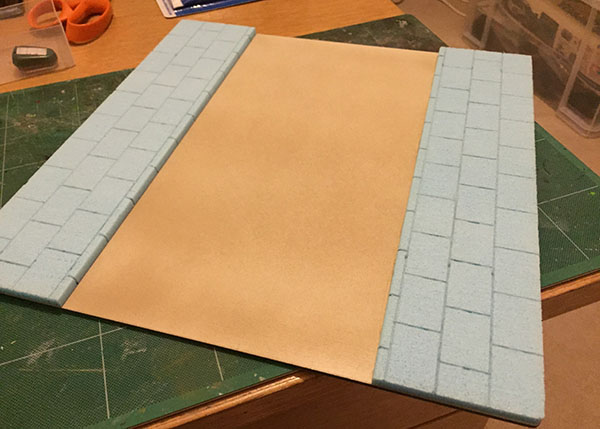
Finally the whole thing together … note that I had to sand the sign material down as it has a very shiny surface.  I then sprayed it with a ‘suede’ effect paint out of a can from B&Q to give me a texture for the road surface.

1970s_Streets_6

A second image with a figure for scale (note the figure is mid-production so don’t judge it!)

1970s_Streets_5

I’ll slap some paint on it tonight and see what it looks like.

Note the brick wall … comes from an excellent site called Paper Brick. You can select from a number of customisable options and it spits out a .pdf of a brick wall to order.  If you use it, don’t forget to thrown the designer a donation.

My only concern is that I can’t easily put any ‘road furniture’ on the tarmac unless I paint it on or glue on a picture.  I was thinking of maybe having 2 layers of the syrofoam but I’m not sure …

ACW 15mm – Union Painting tutorial – Part 3

February 5th, 2015

Days 3 & 4

Day 3: Highlighting the base colours

Well we start with the wood of the rifles using a Vallejo Leather Brown 147.  Okay, strictly speaking this is not a highlight but the rifles are metal and wood so this finishes them off. I tackle them now as the brush work has to be quite tight and any accidents can be glossed over in the next stages.

Some washes next, firstly Vallejo Fleshtone Shade 204.  This is essentially a quick way of getting a result and in 15mm it works well.  It tones down the skin and shades in all the right places.

The next wash is for the trousers, Vallejo Blue Shade 207 but mix with water in a 2:1 ratio.  To me this give a perfect result, and by that I mean a good look for minimal effort.  It’s important to think it down a little but not too much.

The final stage of Day 3 is to highlight the jacket with some Vallejo Prussian Blue 051.  I just applied lines along the folds of the jacket and wasn’t too fussy about the result, in fact I also tidied up any stray paint from the other stages on the jacket.

Day 4:  Final touches

So we begin Day 4 with Vallejo Black 169.  Although the undercoat is black you will find that a) during the painting you will have some painting overlap to tidy and b) the handling of the model, even on my handy sticks, leads to a bit of wear that affects the black most.  It’s important to try and give a slap of black all over the black parts of the model as it makes the coverage a bit thicker and gives a bit more depth.  Remember to do the straps; use a small brush, ‘0’ size should be fine.

Next we paint the water bottle with the same blue paint as the trousers, Vallejo Andrea Blue 065, but this time no wash, so it’s going to look a bit brighter than the pants.  In practice these bottles were a variety of colours with manufactures covering them with whatever material was to hand; however, blue seems popular.

After that I paint the water bottle strap a Vallejo Off White 004.  This requires a steady hand and it’s one of the details that makes the model look better painted than it actually is.

Next it’s Vallejo Gold 172 for the plate on the cartridge pouch, the end of the bayonet scabbard and, if you can, the belt buckle and front cross strap buckle/plate.

Then finish off with the hair.  I just stuck to 3 colours, black, brown and a light brown (for blond hair).

This just leaves the varnishing and basing which I configures as a weekend job and not part of the 4 day routine.

ACW 15mm – Union Painting Tutorial – Part 2

February 2nd, 2015

The four day plan: Days 1 & 2

Day 1 : Preparation

Take 15 miniatures and do the general preparation work filing off all the mould lines and flattening the bases.  Why 15 miniatures? Well that’s the batch size that gives 5 bases (3 figures per base).  It’s worth nothing that I’ll tag on the odd figure here, so I might add the disordered marker for the unit, (a dead infantryman), or maybe 4 Artillery personnel.

Then I glued them onto a wooden stick so I could hold them while painting.  A word of warning though … in the picture it shows 5 figures on each stick … this is too many.  I later used 2 figures on a stick half the size, (about 10cm / 4″). Finally they get an undercoat of Vallejo Surface Primer – Black.  Normally for 28mm figures I use a grey primer and only use Black (or White) if there is some specific benefit, e.g. I would use black as an undercoat if the figure was mostly armoured.  However, for smaller scale figures the black undercoat creates a natural shade such that if you miss a bit white /grey will stand out much more than black.

Day 2: The Base Coats

The Rifle gets a strong drybrush of Vallejo Oily Steel 177.  I do this first because some of the detail is so small it’s harder to paint on afterwards.

Next we put some Vallejo Andrea Blue 065 on the pants. Finally its Vallejo Medium Fleshtone 021 for the skin and Vallejo Dark Prussian Blue 050 for the jacket.

That’s all for now, days 3 and 4 in part 3.

ACW 15mm – Union Painting Tutorial – Part 1: Intro

January 28th, 2015

So … I’ve been fascinated by the American Civil War period for a very long time and dabbled with various scales and rules.  I did go down the 6mm route and do have some forces built up for the Fire & Fury brigade level rules (‘Original’ – OF&F) but new projects came and took priority causing my ACW project to grind to a halt.  I think the primary causes of moving away from the project has been the rules system and a certain amount of analysis paralysis over basing.

Prior to the end of 2014 I came across a bundle of 15mm ACW figures I had bought from Battle Honours many years ago and did a little test painting, (actually I was mainly wanting to paint horses for practice).  I’ve had the Regimental Fire & Fury rules (‘RF&F’) for a while and thought now, or at least 2015, was the time to get a ACW project underway.  It is quite an undertaking as I’m going to have to do both Union and Confederate forces.

The first step was to take stock of where I was and what I wanted to achieve; a few decisions had to be made …

Rules: Regimental Fire & Fury:  Why? Because RF&F is well supported and has an active/good forum, I like the OF&F rules ‘style’ on which it is based and Age of Eagles is popular in the club and is based on OF&F, (so a head start in rules learning and playing the game).

Figures: Peter Pig: Why? All the usual reasons I suppose, they are a reasonable price, a good range of figures (including markers for disordered, out of ammo etc.) and are good quality.  It’s fair to comment on the figure quality a bit more here … firstly, you get a range of poses, 3 in fact in each 8 figure pack. Secondly, the design really lends itself well to painting in every way with the detail being ‘just right’ and the poses being quite animated, and finally, the castings are good with no flash and minimal mould lines (although I didn’t know this until I had bought a load). Oh, and they are also easily available in the UK … and the service is good.

Basing: Litko: Actually I base most of my figures on Litko bases now.  I use the 0.8mm ply and the standard magnetic material as my basing convention and so I placed an order for a range of bases I needed for RF&F.  Infantry bases are 1″x 3/4″ with 3 figures per base.

Once all that had been established I had to decide on the scope of the project; I had to work on something manageable that would give me a good base for grander things.  I decided to work towards creating all the figures needed for the 1st scenario in the main RF&F rulebook which works out at around 50 stands a-side, mostly infantry.  This is still a sizable amount but it’s really the minimum for a decent game and your average battle is more like 100 stands a-side.

I then worked out a painting plan for the Union Infantry and here I had two goals, a) don’t rush it and try and paint all the units up in a short time, and b) do a reasonable and easily achievable amount of work per night.  This way I figured I would actually get to the end of the project.

The plan was based on producing 5 stands of infantry (15 figures) in 4 days.  Strictly speaking this took the figures from the packet to painting but not varnishing or basing for which extra time would have to be found.  With this strategy I could get both forces done in 80 days …

Evil Mastermind’s Lair – Part 2

November 10th, 2014

Just a brief update to the Evil Mastermind’s Lair …

I had to finish the base off for a club open day so there are a few more images in the gallery. Here is a close up of the completed rock face.

Evil_Lair_17

I made up some Unit Cards for the game which were quite useful.

Unit Cards v3 2a

On the back of these was a full description of the special effects.

Evil Mastermind’s Lair

June 27th, 2014

This week I have been mostly working on an Evil Mastermind’s lair …

The idea is to get this organised for a 7TV game but also to have it as a piece of scenery for use in multiple games.  To that end I have tried to make a variety of different rooms that could be objectives for any scenario and created multiple routes from one end of the board to the other.

The board itself is 600mm by 1,200mm (2′ x 4′), and the plan would be to butt another similar sized board up to it in order to create an outside section.  I may offer alternative ways into the base from this second board, thus the obvious way in is through the garage but maybe there is a sewer outlet that allows characters to get into the WC.

Descent 2nd. Ed. – Progress

May 12th, 2014

Just some update on Progress …

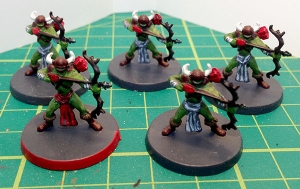
Goblin Archers:

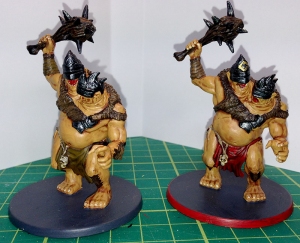
Ettins:

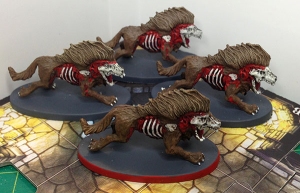
Barghests:

Descent 2nd Edition – Journeys in the Dark

April 26th, 2014

I decided to paint up my Descent 2nd Ed. figures, starting with the Giant Spiders.

Giant_Spiders